Guides / Finishing
Laser Engraving Anodized Bike Parts: Depth, Contrast and Placement
October 18, 2026
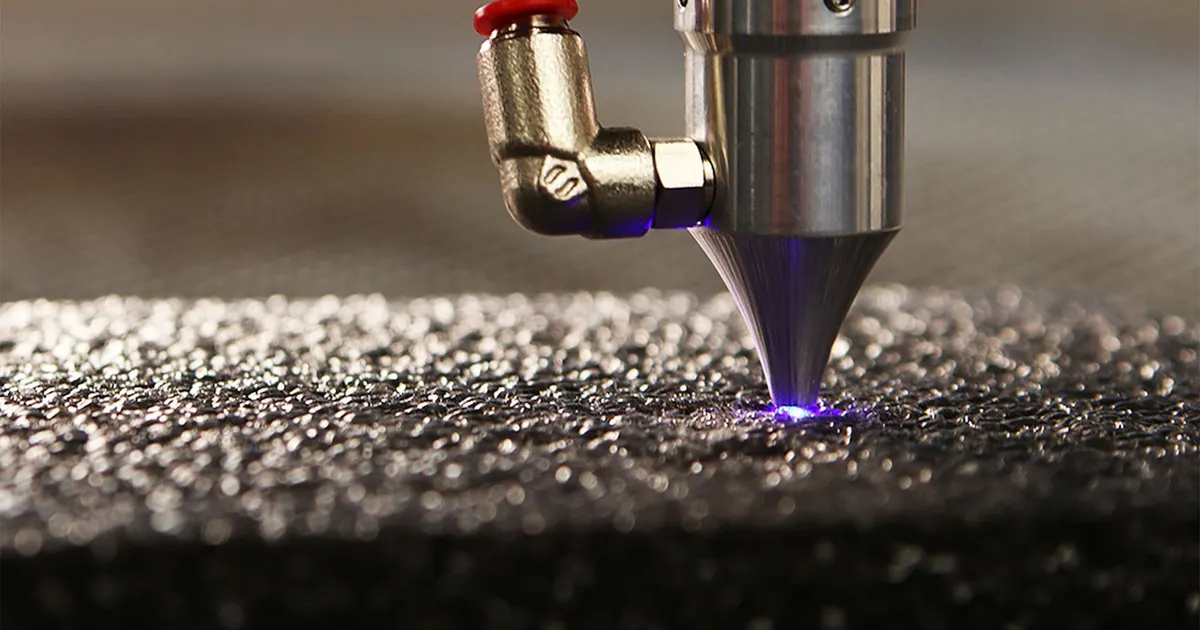
A laser logo on an anodized part is one of the cleanest ways to put a brand on a bike component. There is no ink to wear off, no label to peel and no extra part. But the result depends on three things the drawing rarely states: how the laser interacts with the coating, which finish is under it and where on the part the mark sits. Get those right and the logo lasts as long as the part.
What the laser actually does
Anodize is a hard ceramic-like layer grown on the aluminum. Dye sits in its pores and a seal closes them. A fiber laser, the usual type for metal marking, delivers short pulses that heat the surface so quickly that the coating is ablated, meaning it is vaporized and removed in a thin layer. Where the coating is gone, the bare metal shows through.
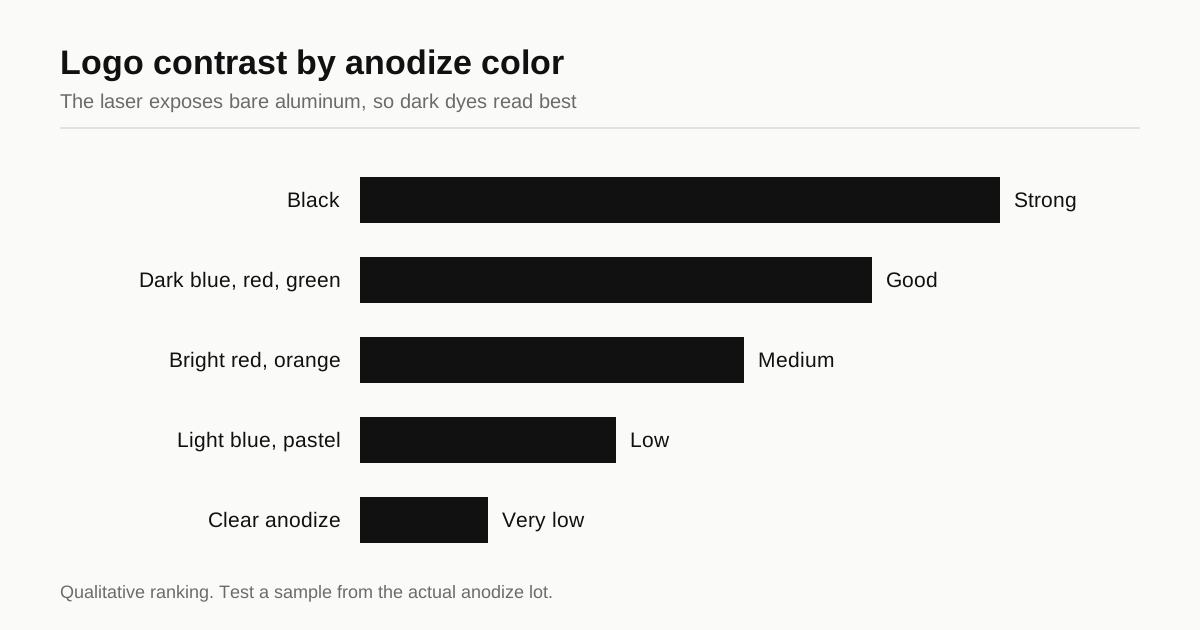
That means the mark is the absence of color. The contrast between mark and background is the difference between the dyed coating and the bare aluminum underneath, which is light gray to silver.
There are two common ways to get a mark:
- Ablation. The laser removes the coating with little or no cut into the metal. The mark is flat and very sharp. This is what most buyers want.
- Engraving. The laser makes several passes and removes metal as well. The mark has depth you can feel with a fingernail. It costs more time and exposes more metal.
A typical Type II anodize is roughly 10 to 25 micrometers thick. A light pass removes part of that. A deeper pass goes through it and into the aluminum. The difference between Type II and Type III matters here because a thicker hard coat takes more energy to clear.
Contrast: why dye color decides everything
| Anodize color | Contrast with bare aluminum | Notes |
|---|---|---|
| Black | Strong | The standard choice for sharp logos |
| Dark blue, dark red, dark green | Good | Dark dyes read well |
| Bright red, orange, gold | Medium | Readable, less sharp |
| Light blue, silver, pastel | Low | The mark looks faint |
| Clear anodize | Very low | Often only a slight change in shine |
These ratings are qualitative. They show the trend and not a measurement. If your brand color is light, expect a softer logo or choose a different marking method.
Different batches can differ. The same laser settings on two anodize lots may give two looks, because dye density and seal quality change. This is the same issue as color matching in anodizing. Ask for a sample from the actual lot and approve it before the batch.
Where on the part to put the mark
A bike part carries load, and the laser leaves a mark where that load may concentrate. Engraving that cuts into the metal creates a small notch, and notches are where fatigue cracks can start. The rules are simple:
- Keep deep marks away from high stress zones. On a crank arm, avoid the area near the spindle and the pedal eye. On a stem, avoid the transition between the extension and the clamp. On a seatpost, avoid the part that sits just above the collar.
- Prefer flat or gently curved faces. Laser focus is fixed. A strongly curved or sloped face gives a mark that fades at the edges.
- Allow space around the mark. Leave a clear border so the pattern does not run into a radius or an edge.
- Use ablation for load-bearing faces. A shallow mark removes coating without cutting a notch.
The weight versus strength guide explains where stress sits on common parts. If the part will go through certification testing, ask the test lab whether the mark position affects the result. More on that in the ISO 4210 overview.
Process order and what the bare metal does
The standard order is: machine, finish the surface, anodize, dye, seal, then laser. The laser works on the finished coating and leaves bare metal in the logo.
That bare area is not protected. Aluminum forms its own thin oxide, so a small logo is not a corrosion risk on a part used in normal weather. If the part will see salt, such as winter commuter bikes or coastal use, ask whether a clear coat or a re-seal step makes sense after marking. It adds a step and a cost.
The other order is to laser the bare machined part and anodize afterward. The logo then takes coating like the rest, and the result is a mark with a different texture or a slightly different tone. It suits a “tone-on-tone” look but not high contrast. Both orders are valid. The point is to state which one you want.
Alternatives to compare
| Method | Strength | Weakness |
|---|---|---|
| Laser on anodize | Sharp, permanent, no extra part | Needs a dark dye for contrast |
| Pad printing | Any color, cheap | Wears off with handling |
| CNC engraving | Deep, tactile | Slower, notch risk |
| Etched before anodize | Subtle, protected | Low contrast |
| Sticker or decal | Cheap, any artwork | Peels, looks cheap on premium parts |
For high-end parts the laser is usually the best fit. For a low-cost line, printing or a decal may be fine. Match the method to the product’s price point.
What to put on the drawing
A logo needs a drawing note. Without one, the shop guesses, and the first article may not match what you imagined.
- Artwork file as vector (SVG, DXF or AI) at true size
- Position, with a dimension to a datum edge
- Size of the logo in millimeters, and minimum line width (0.2 mm is a common lower limit)
- Process: ablation or engraving, and the maximum depth if engraving
- Order: before or after anodizing
- Color of the anodize underneath
- Acceptance: a reference sample, a photo or a master part
A line width below about 0.15 mm may not reproduce. Very small text, under 1 mm tall, also tends to fill in. If the logo has fine detail, send a test first.
Cost
Laser marking is usually a small part of the unit price. A simple logo takes seconds to a few minutes. The costs that surprise buyers are setup and fixturing, since each part must sit at the same position under the laser. On a low volume order, setup dominates. On a larger run, a simple fixture brings the cost down to a small amount per piece. The cost guide breaks down what else goes into the unit price.
Before you approve artwork
- Choose a dark dye if contrast matters
- Place the mark on a low stress face
- Ask for a sample on the actual anodize lot
- State the process order and any depth limit on the drawing
- Check that the smallest line is wide enough to reproduce
Common mistakes
- Approving artwork on a screen. Contrast depends on the real dye and the real laser. Approve a physical sample.
- Placing the mark where the part is thinnest or most loaded. Move it to a calm face.
- Sending a raster logo. A pixel image blurs at the edges when the shop converts it. Send vector files.
- Fine detail below the laser’s limit. Hairlines and tiny text fill in. Test the smallest feature first.
- Switching anodize suppliers without retesting. A new dye lot can change the contrast and the look of the same logo.
A laser mark is permanent, so a wrong logo means a scrapped part. A first article with the real artwork is cheap insurance.
Send the drawing and the artwork through the RFQ page and we match you with up to 3 machine shops. They reply within 24 business hours and can tell you which finishers on their side do laser marking in house.
Frequently asked questions
Does laser engraving weaken a bike part?
A shallow mark in a low stress area has no practical effect. A deep mark in a highly loaded zone, such as the outer face of a crank arm near the spindle, can act as a stress raiser. Keep logos on low stress faces and ask the designer where those are.
Why does my logo look gray instead of white?
Contrast depends on how much anodize the laser removes and on the dye. The laser exposes bare aluminum, which looks light silver or gray. A black dye gives strong contrast. A light dye or clear anodize gives little. Test a sample from the same anodize lot before you approve artwork.
Should the logo be engraved before or after anodizing?
Usually after, on a dyed part, because the laser removes the colored layer to show the metal underneath. Marking before anodizing is possible and gives a different look, since the marked area then takes coating too. State the order on the drawing.
Need a quote for this part?
Send the drawing. We match you with up to 3 shops that machine bike parts and reply within 24 business hours.
Get matched with a bike parts shop