Guides / Finishing
Deburring and Edge Breaks: Prepare Bike Parts for Anodizing
October 14, 2026
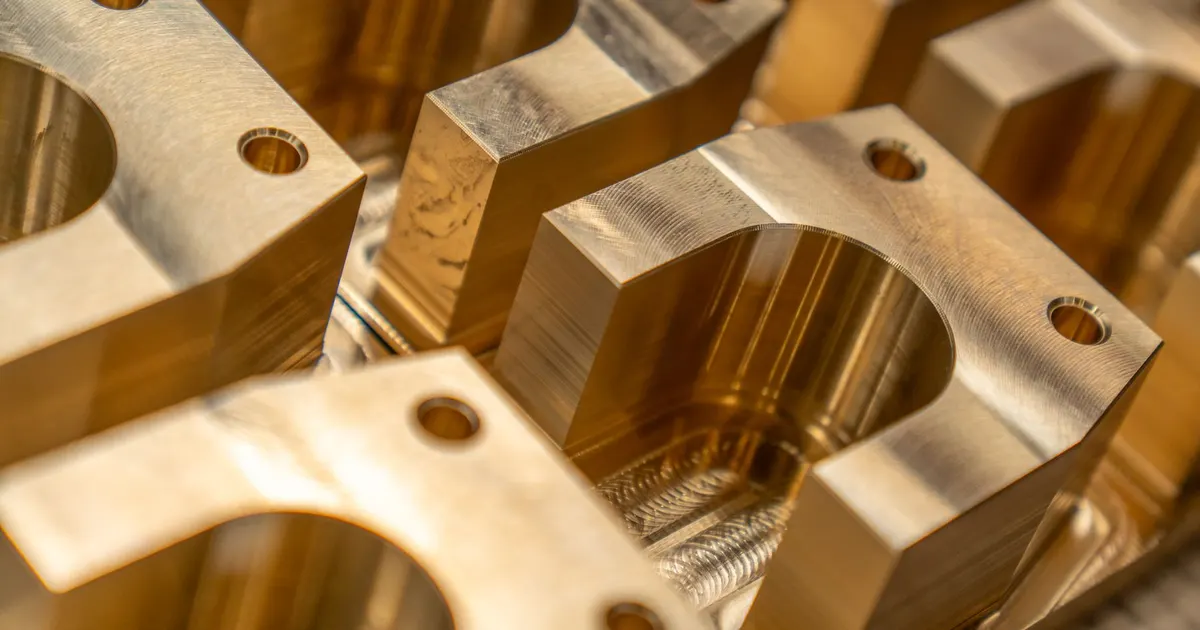
A burr is a thin ridge of metal left on an edge after cutting. A sharp edge is the clean corner where two faces meet. Both cause trouble on a bike part, and both get worse after anodizing. The fix is cheap if it is planned and expensive if it is left to the finisher or the customer. This guide covers what goes wrong, how shops deburr and what to write on the drawing.
Why edges matter more with anodize
Anodize is a hard, brittle layer grown on the metal. On a flat face it is even. On a convex edge, the coating grows from both faces and meets at the corner, where it is thin and weak. A sharp corner gives a coating that cracks and flakes at the first knock.
Three things go wrong at a burr:
- The burr breaks off in service and leaves bare metal, which shows as a bright line in the dyed color.
- The coating chips from the edge, and the chip often spreads along it.
- The burr cuts skin, cable housing or the rider’s hand. A sharp edge on a stem faceplate or a crank arm is a liability.
There is also a process issue. Parts hang on racks in the anodize tank, and electrical contact matters. A burr that catches on a rack contact or traps a drop of acid can leave a mark. A clean, broken edge is part of getting a uniform finish. For the finish side, see the anodizer guide.
Burr versus edge break
These are different, and the drawing should treat them separately.
A burr is unwanted material that stands up from the edge. It forms where a cutter exits the part, where a drill breaks through and where two cuts meet. It must be removed.
An edge break is a controlled, small chamfer or radius that replaces the sharp corner. It is a design feature, and it has a size. The international standard for edges of undefined shape is ISO 13715, which lets a drawing state the allowed burr and the allowed removal on an edge. If the drawing is silent, the shop picks.
Where burrs hide
| Location | Why it is a problem | Typical fix |
|---|---|---|
| Cross-hole intersections | Burrs form inside where bores meet | Brush, abrasive flow or a programmed deburring tool |
| Thread starts | Burrs catch the bolt | Chamfer the thread entry, light brush |
| Pocket corners | Tool exit leaves a ridge | Corner pass or tumbling |
| Slot ends | Burr at the exit of the cutter | Edge pass in the program |
| Bore exits | Drill breakthrough burr | Back chamfer, deburring tool |
| Parting faces | Burr from cut-off | Face pass, tumbling |
The burrs that hurt most are the ones nobody can see, inside a bore or behind a slot. A stem clamp with a burr inside the steerer bore scratches a carbon steerer, and a burr inside a pinch slot can raise one side of the clamp.
How shops deburr
Shops use several methods, often in combination.
| Method | Good for | Watch out for |
|---|---|---|
| Hand tools and files | Small runs, access to odd spots | Operator variation, slow |
| Abrasive nylon brushes | Light burrs, consistent edge break | Weak on big burrs |
| Vibratory tumbling with media | Batches of small parts | Changes size slightly, rounds sharp details |
| Bead blast | Light edge softening and matte finish | Not a true deburring method |
| Programmed edge pass | Exact chamfers on exposed edges | Adds machine time |
| Thermal or electrochemical | Hidden burrs, high volume | Special equipment |
For bike parts, the most common practice is a programmed edge chamfer on visible edges, plus brushing or tumbling for the rest. The programmed chamfer is the most repeatable. It also costs the most machine time, so it is reserved for edges that matter.
Edge break sizes
A general note on the drawing sets the default. The right size depends on the part.
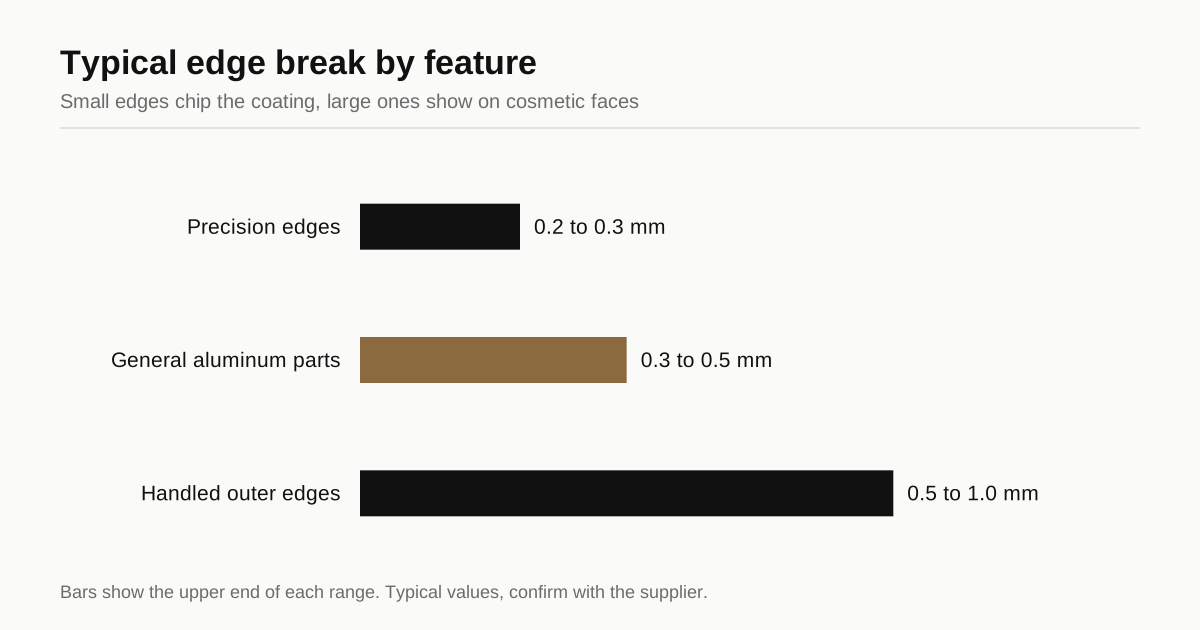
- 0.2 to 0.3 mm suits small precision parts, such as faceplate edges and small spacers.
- 0.3 to 0.5 mm is a common general break for aluminum parts that will be anodized.
- 0.5 to 1.0 mm is for large edges that will be handled, such as the outer edges of a seatpost clamp.
- Radius instead of chamfer gives the best coating cover. Anodize likes a radius.
Smaller than 0.2 mm is hard to measure and easy to lose in the coating. Larger than 1 mm starts to alter the look and the fit of mating parts. Edge breaks near bearing seats and threads need care, since they affect the seat geometry. For these, use the size agreed in the bearing seat guide and the thread guide.
Sequence and sizes
Deburr before anodizing. The coating must go on a finished edge. The usual order is machining, deburring, cleaning, then anodizing. If the part is bead blasted for finish, the order is machine, deburr, blast, anodize, since blasting without prior deburring can roll a burr into the surface instead of removing it.
Tumbling and brushing change dimensions by a few micrometers. On parts with tight tolerances, they are done before final measurement or the affected features are masked. The coating adds its own growth. See the growth calculator to estimate how much.
Cosmetic faces need special care. A tumbled part has a softly rounded look on all edges. A machine-chamfered part has a crisp, bright edge that catches light. Both are valid, but they look different, and mixing methods on one part looks like a mistake. Decide on the look first.
What to put on the drawing
A line in the title block does most of the work.
- General edge break, for example: “Break all sharp edges 0.3 mm max, remove all burrs. Per ISO 13715.”
- Exceptions: larger breaks on visible edges, none on mating edges
- Which edges are cosmetic, and the acceptable method for them
- Inside surfaces: whether cross-hole burrs must be removed
- Any edge that must stay sharp, such as a sealing edge or a scraping edge
- Whether deburring happens before or after final measurement
A good drawing is specific about the few places that matter and uses a general rule for the rest. The drawing review guide shows how shops read these notes, and the design for machining guide explains how edge breaks fit into the overall part design.
Cost
Deburring is labor or machine time. On a simple part it is a small share of the price. On a complex part with many pockets and cross holes it can be a visible line item, since each hidden burr needs to be found and removed. A programmed edge pass on a stem faceplate adds a few minutes. Hand finishing a complex crank arm can take much longer.
Ask the shop what is included in the quoted price and what would cost extra. A quote that excludes deburring will look cheap, and the work lands on someone else. The quoting guide explains how to compare quotes fairly.
A quick checklist
- Add a general edge break note, with a size
- Call out exceptions on cosmetic and mating edges
- State whether hidden burrs inside holes must be removed
- Deburr before anodizing, and before blasting
- Ask which method the shop uses and why
- Check a first article for edge condition under a loupe
Send the drawing through the RFQ page and we match you with up to 3 machine shops. They reply within 24 business hours.
Frequently asked questions
How big should an edge break be on a bike part?
A common default is 0.2 to 0.5 mm. Smaller edges chip the anodize. Larger ones show on cosmetic faces and cost machine time. Set a general note on the drawing and call out exceptions on visible edges and on edges near bearing seats.
Can anodizing hide a burr?
No. Anodize follows the surface, and at a sharp edge it is thin and brittle. A burr stays a burr under the coating, and it often chips and exposes bare metal in the first weeks of use.
Is hand deburring acceptable for production?
For small batches, yes. For larger runs it is slow and varies between operators. Tumbling, brushing or a programmed edge pass in the machine give more consistent results. Ask the shop which method it will use.
Need a quote for this part?
Send the drawing. We match you with up to 3 shops that machine bike parts and reply within 24 business hours.
Get matched with a bike parts shop